Remember the glee of peddling your tricycle? When the pedals were moving, so were your legs. That is the way it is with a fixed gear motorcycle or fixie. If the bike is moving, so are your legs. A fixie can be enjoyable to ride and give you a decent workout at the same time. The charm of a fixie is in its simplicity.
Building a fixie from a former road bike is pretty simple. If you have the time or patience, look for a road bike from the 80s or 90s. Most of the time these can be picked up relatively inexpensively. A handy highlight on an older road bikes is road dropouts that are not of the vertical type. This allows the wheel to be moved back and forth in the dropouts to adjust the chain tension of the fixed gear.
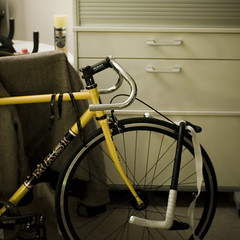
Once you have acquired a road bike, it is time to start the task of removing unnecessary parts. Remove the chain, all derailleurs, shifters, and rear brake. This will also necessitate the dismissal of the rear brake lever from the handlebars. Of course you can also convert the handlebars to a bullhorn style or straight style. I have seen a lot of mods where the drop bars are turned upside down and cut in distance to the desired look.
Hopefully you have detachable chainrings on the crankset. You will only need one and typically use the smallest. Most often the small chainring is placed on the outside position.
An prominent step is to resolve the gear ratio to use on your fixie. Count the teeth on the remaining chainring and find a gear ratio website to form out how many teeth the rear cog should be for the desired gear ratio. Something in the low to mid sixties would give you plentifulness of gear for puttering around. If you want to keep up with the urban traffic, something in the low 80s should be sufficient. As you come to be a more proficient at riding your fixie, you will come to be more adept at pedaling with a high cadence. Typical road bike chain is 3/32 pitch. Normal track bike chain is 1/8. To keep costs low, a 3/32 cog is the best way to go because the front chainring and existing road chain will be 3/32 (just needs to be shortened).
Chain alignment is critical. The transition from the rear cog to the front chainring should be a straight shot. Chances are the original road bike wheel has a built-in gear assembly. In this case you will need to fetch a distinct wheel. It can be a road bike wheel with a threaded hub or a special track setup. If the rear wheel is a standard road wheel, you may need to add spacers to the hub before applying the cog to perform the allowable chain alignment.
Once you have the chain alignment figured out you can resolve the chain length. Use a chain tool to perform the exact distance and adjust the tension. You want a limited bit of slack in the chain when the wheel is placed properly in the dropouts.
Okay. We've removed the rear brake. We have removed the shifters and derailleurs. We have removed one of the chain rings from the crankset. And we have found the allowable rear wheel and cog. We have a shortened the chain and adjusted the tension. Now it is time to enjoy your fixie!
No comments:
Post a Comment